For anyone with some wood working skills and the correct numbers, building a flat top electric guitar is really pretty simple. But a carved top seems like more of a daunting task. Well, it isn’t. With the right tools and a little finesse (and confidence) it can be accomplished quite easily. No CNC, no gouges, no planes. All you really need is a router and router table, a panel cove router bit, a router speed control, a random orbit sander and discs, and a cheap curved scraper. This is a bit of “guerrilla luthiery” for ya’ll…
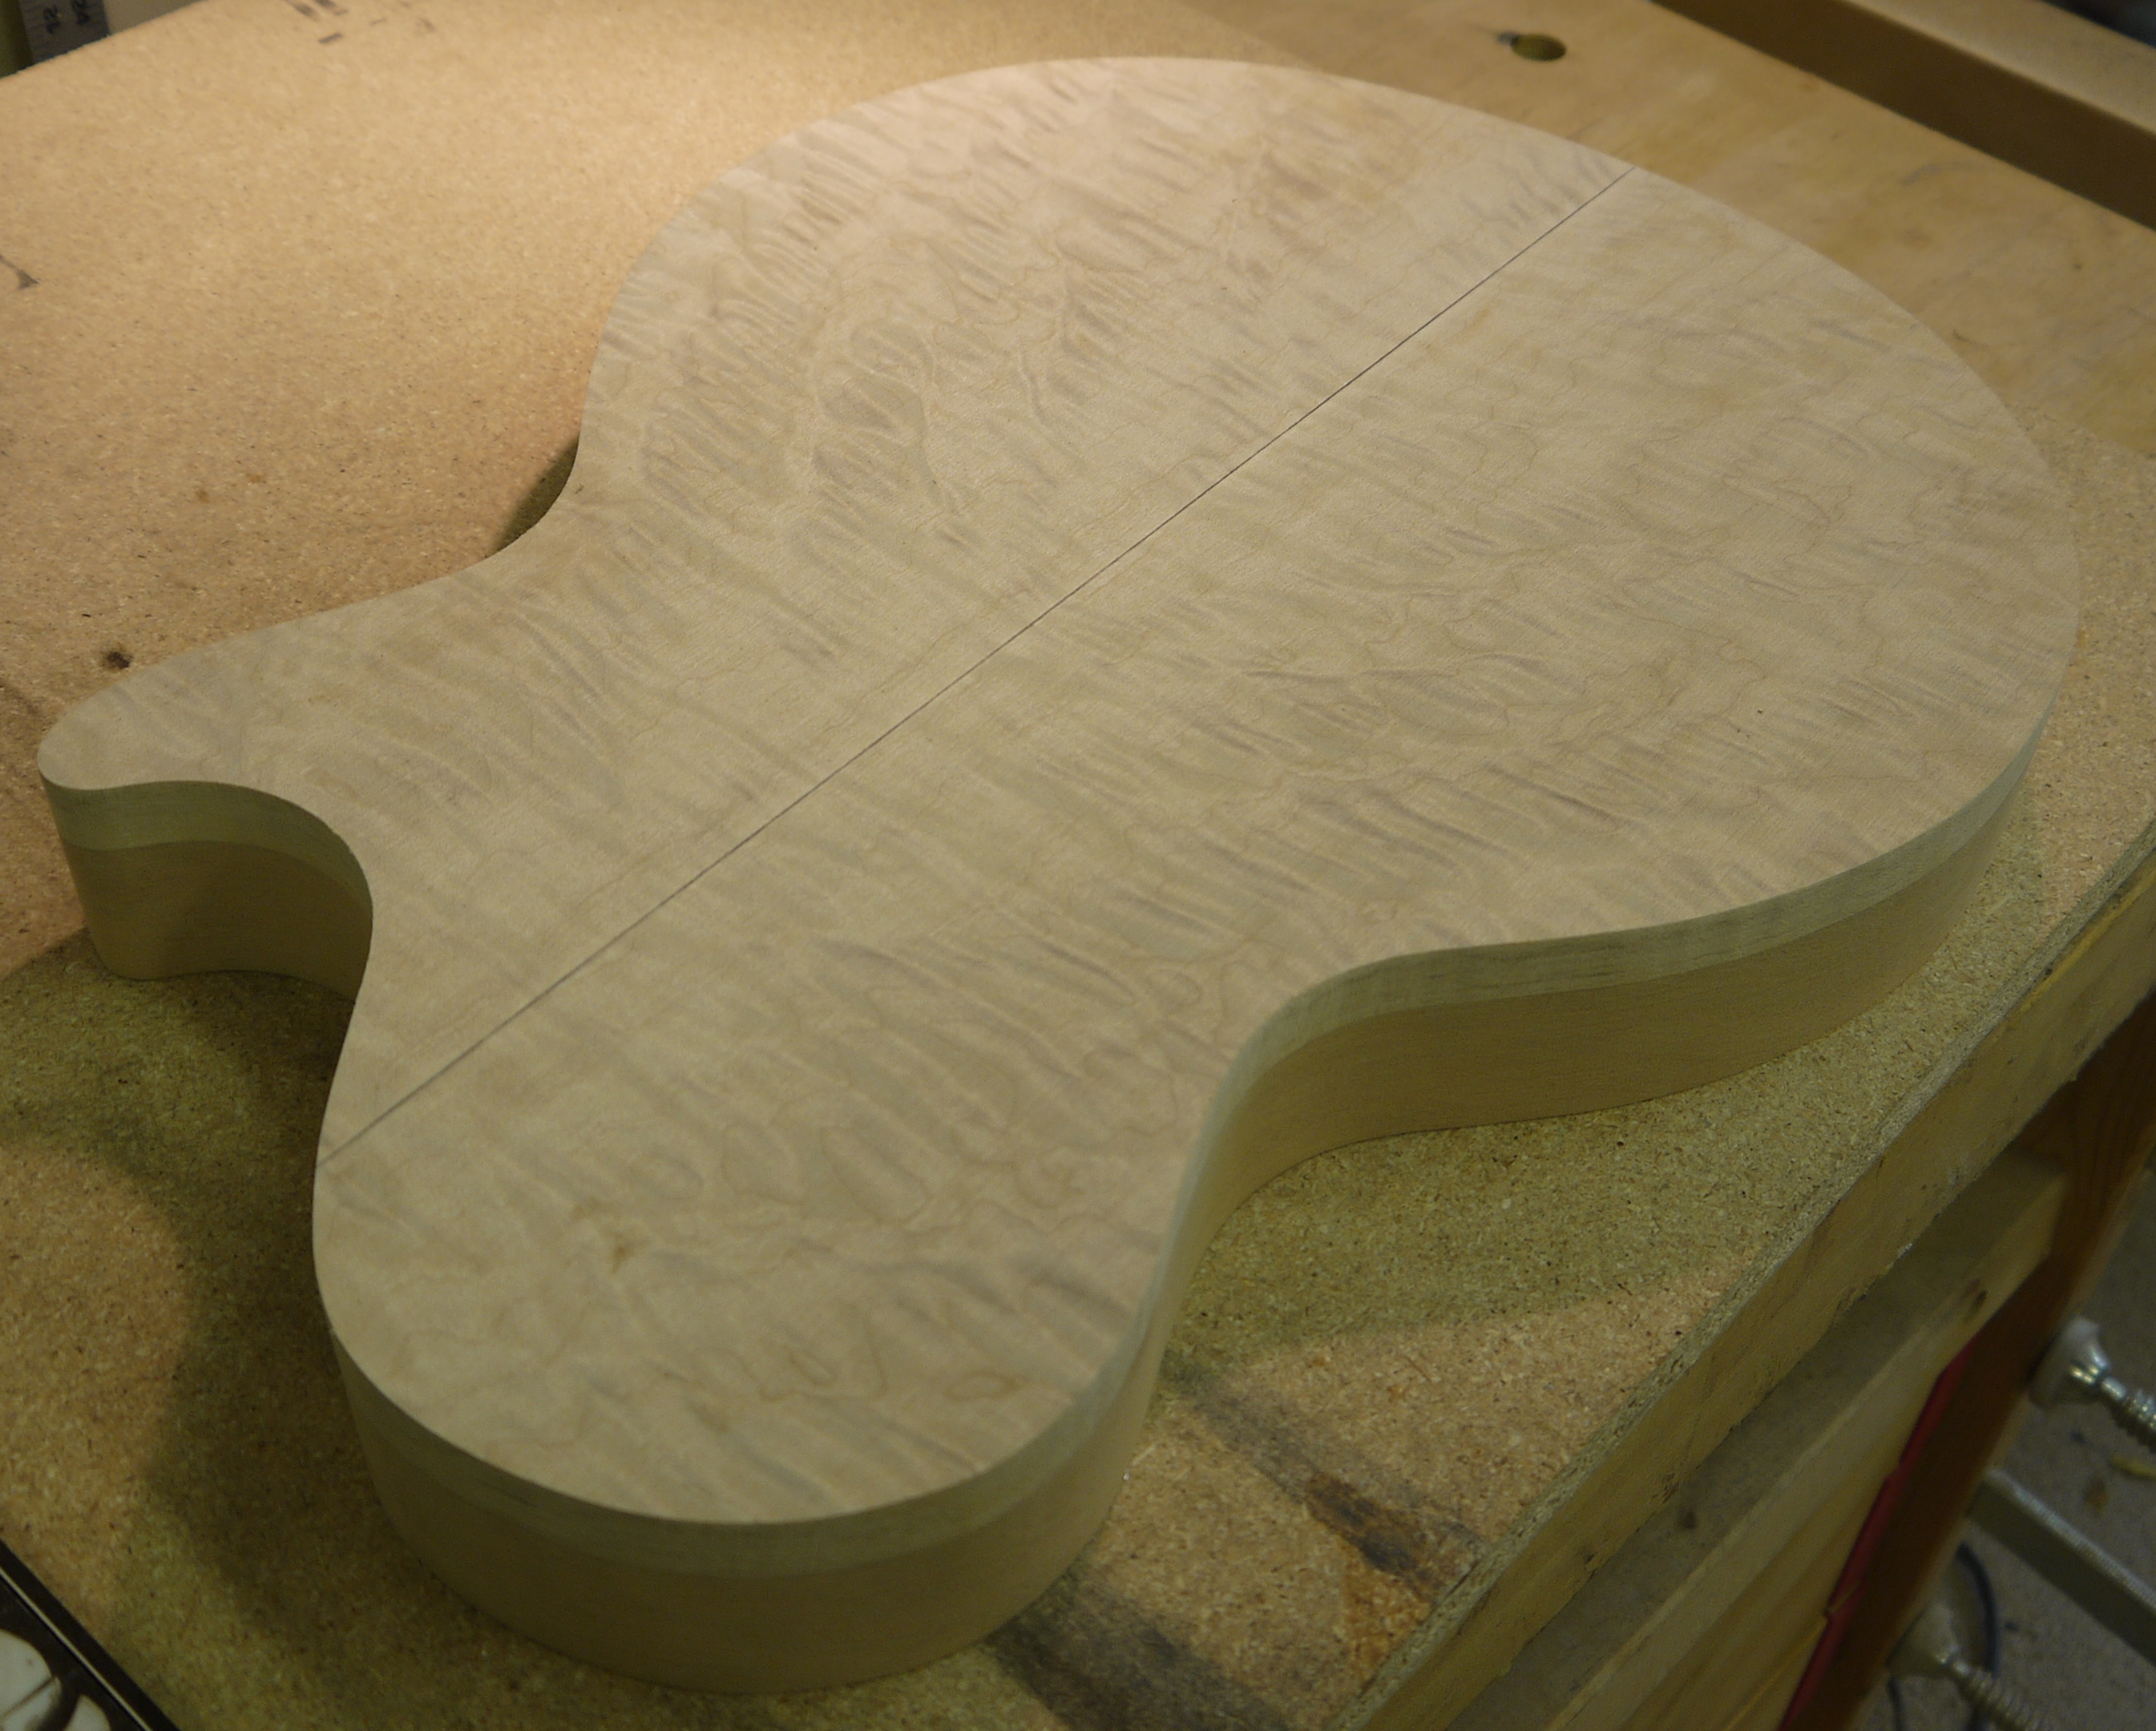
Start by designing your instrument. Make a full size drawing, measuring carefully along the way. This method will not work well on a guitar shaped like Norway, so rein in the craziness. Just about any “guitar” shaped guitar can be made with this method so if it’s your first time, think Les Paul or PRS, not F5 mandolin! Once you’ve arrived at a shape, cut it out and glue it to a piece of 1/2″ MDF. Then cut and sand to the lines, and there’s your body template. That can then be double stick taped to a body blank and you can cut and sand to the edge of the template. Remember you generally want the edge of the guitar to be in the neighborhood of 1 3/4″ AFTER carving, though it’s possible to make the guitar thinner at the edge, so make sure you plan, draw, and double check your design…numbers are important in this business. Once your body is shaped, you’ll end up with something like this…

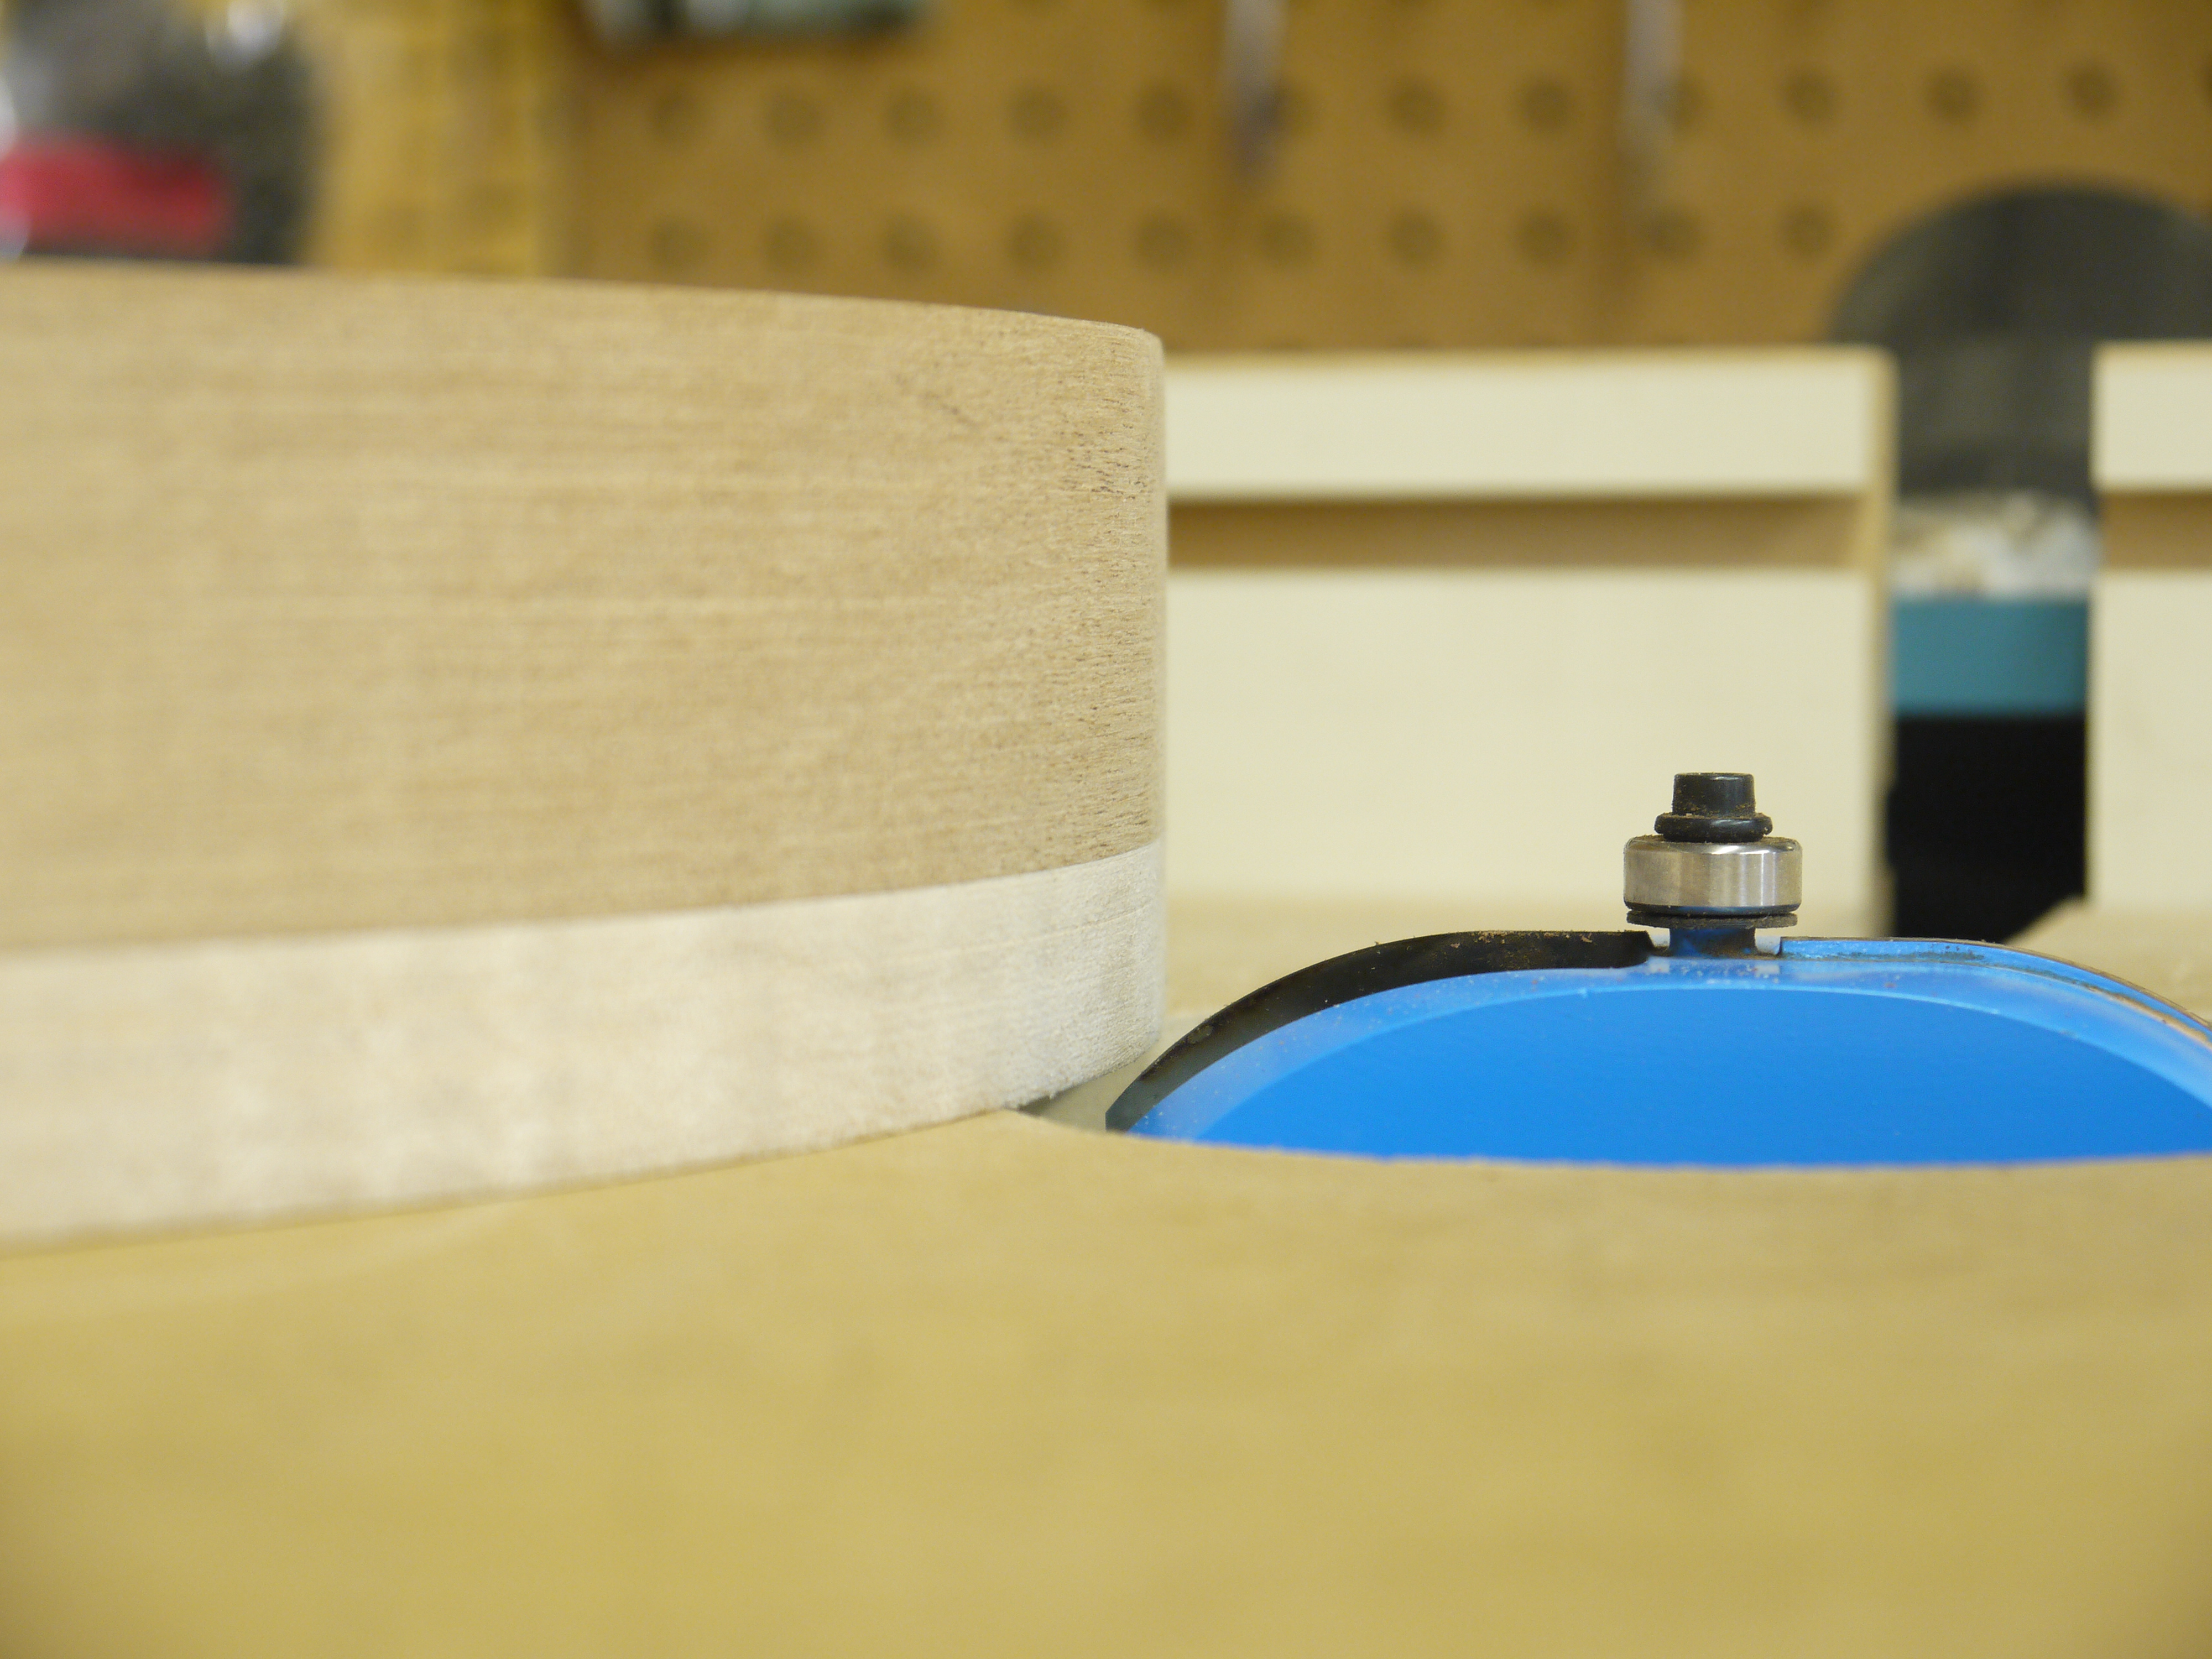
Once the sides are nice and smooth, you are ready to set up your router table. Everything I used for this project I purchased at Rockler, and all in all, it was not that expensive. First, the router bit…a panel cove bit…
As you can see, this bit is big. Too big for the table insert. So it’s chucked into the Porter Cable 690 router OVER the insert. Then you can make a simple table surface from a piece of 3/4″ MDF. Just cut out a hole that is larger than the bit diameter and attach some small blocks to the bottom that will fit into the track on the table.
This surface will allow you to adjust the bit height correctly without it grinding on your table insert. Secure it with a clamp or two to keep it from moving into the bit while you’re cutting. Then you can adjust your bit height. This guitar has a 5/8″ quilted maple top. I want to leave 1/4″ of natural binding around the edge, so I simply take a piece of scrap, flatten one edge, and cut out a crude depth gauge for 3/8″.
So, now you’ve got your router table set up. BUT, if you turn on the router right now it will sound and feel like the whole thing is going to take off like a helicopter and fly around the room. This might be unlikely, but anything that detracts from your sense of security while building is dangerous. Confidence is important. So I always use a router speed control.

With this I can dial up the speed to a level I’m comfortable with. The extra advantage to this is that the speed can be set to a point where you are forced to take small, short, sweeping cuts into the body. If you try to just hog it all out in one pass, the decreased power to the router causes the bit to slow and you will hear it and know to back off. If the sound of the router stays constant, you’ll know you’re cutting the right amount. So, turn on your router at a slow speed and dial it up until it is nearly to take off speed. Then, using some scrap wood, make some test cuts. ALWAYS cut into/against the spin of the router!! NEVER let the bit climb or it will throw your yet unborn guitar thru the wall, or worse!! Now, you’re ready to cut.

Lay the body face down, turn on your router, and begin making small sweeping cuts INTO/AGAINST THE SPIN OF THE BIT. Hold the body tight against the table, keeping your hands away from the bit. I generally stop at the tip of the cutaway(s) and just short of the neck pocket on a single cut guitar. These areas I will just do by hand later. So, make small sweeping cuts until you’re able to run the guitar all the way around with the bearing touching the body edge.
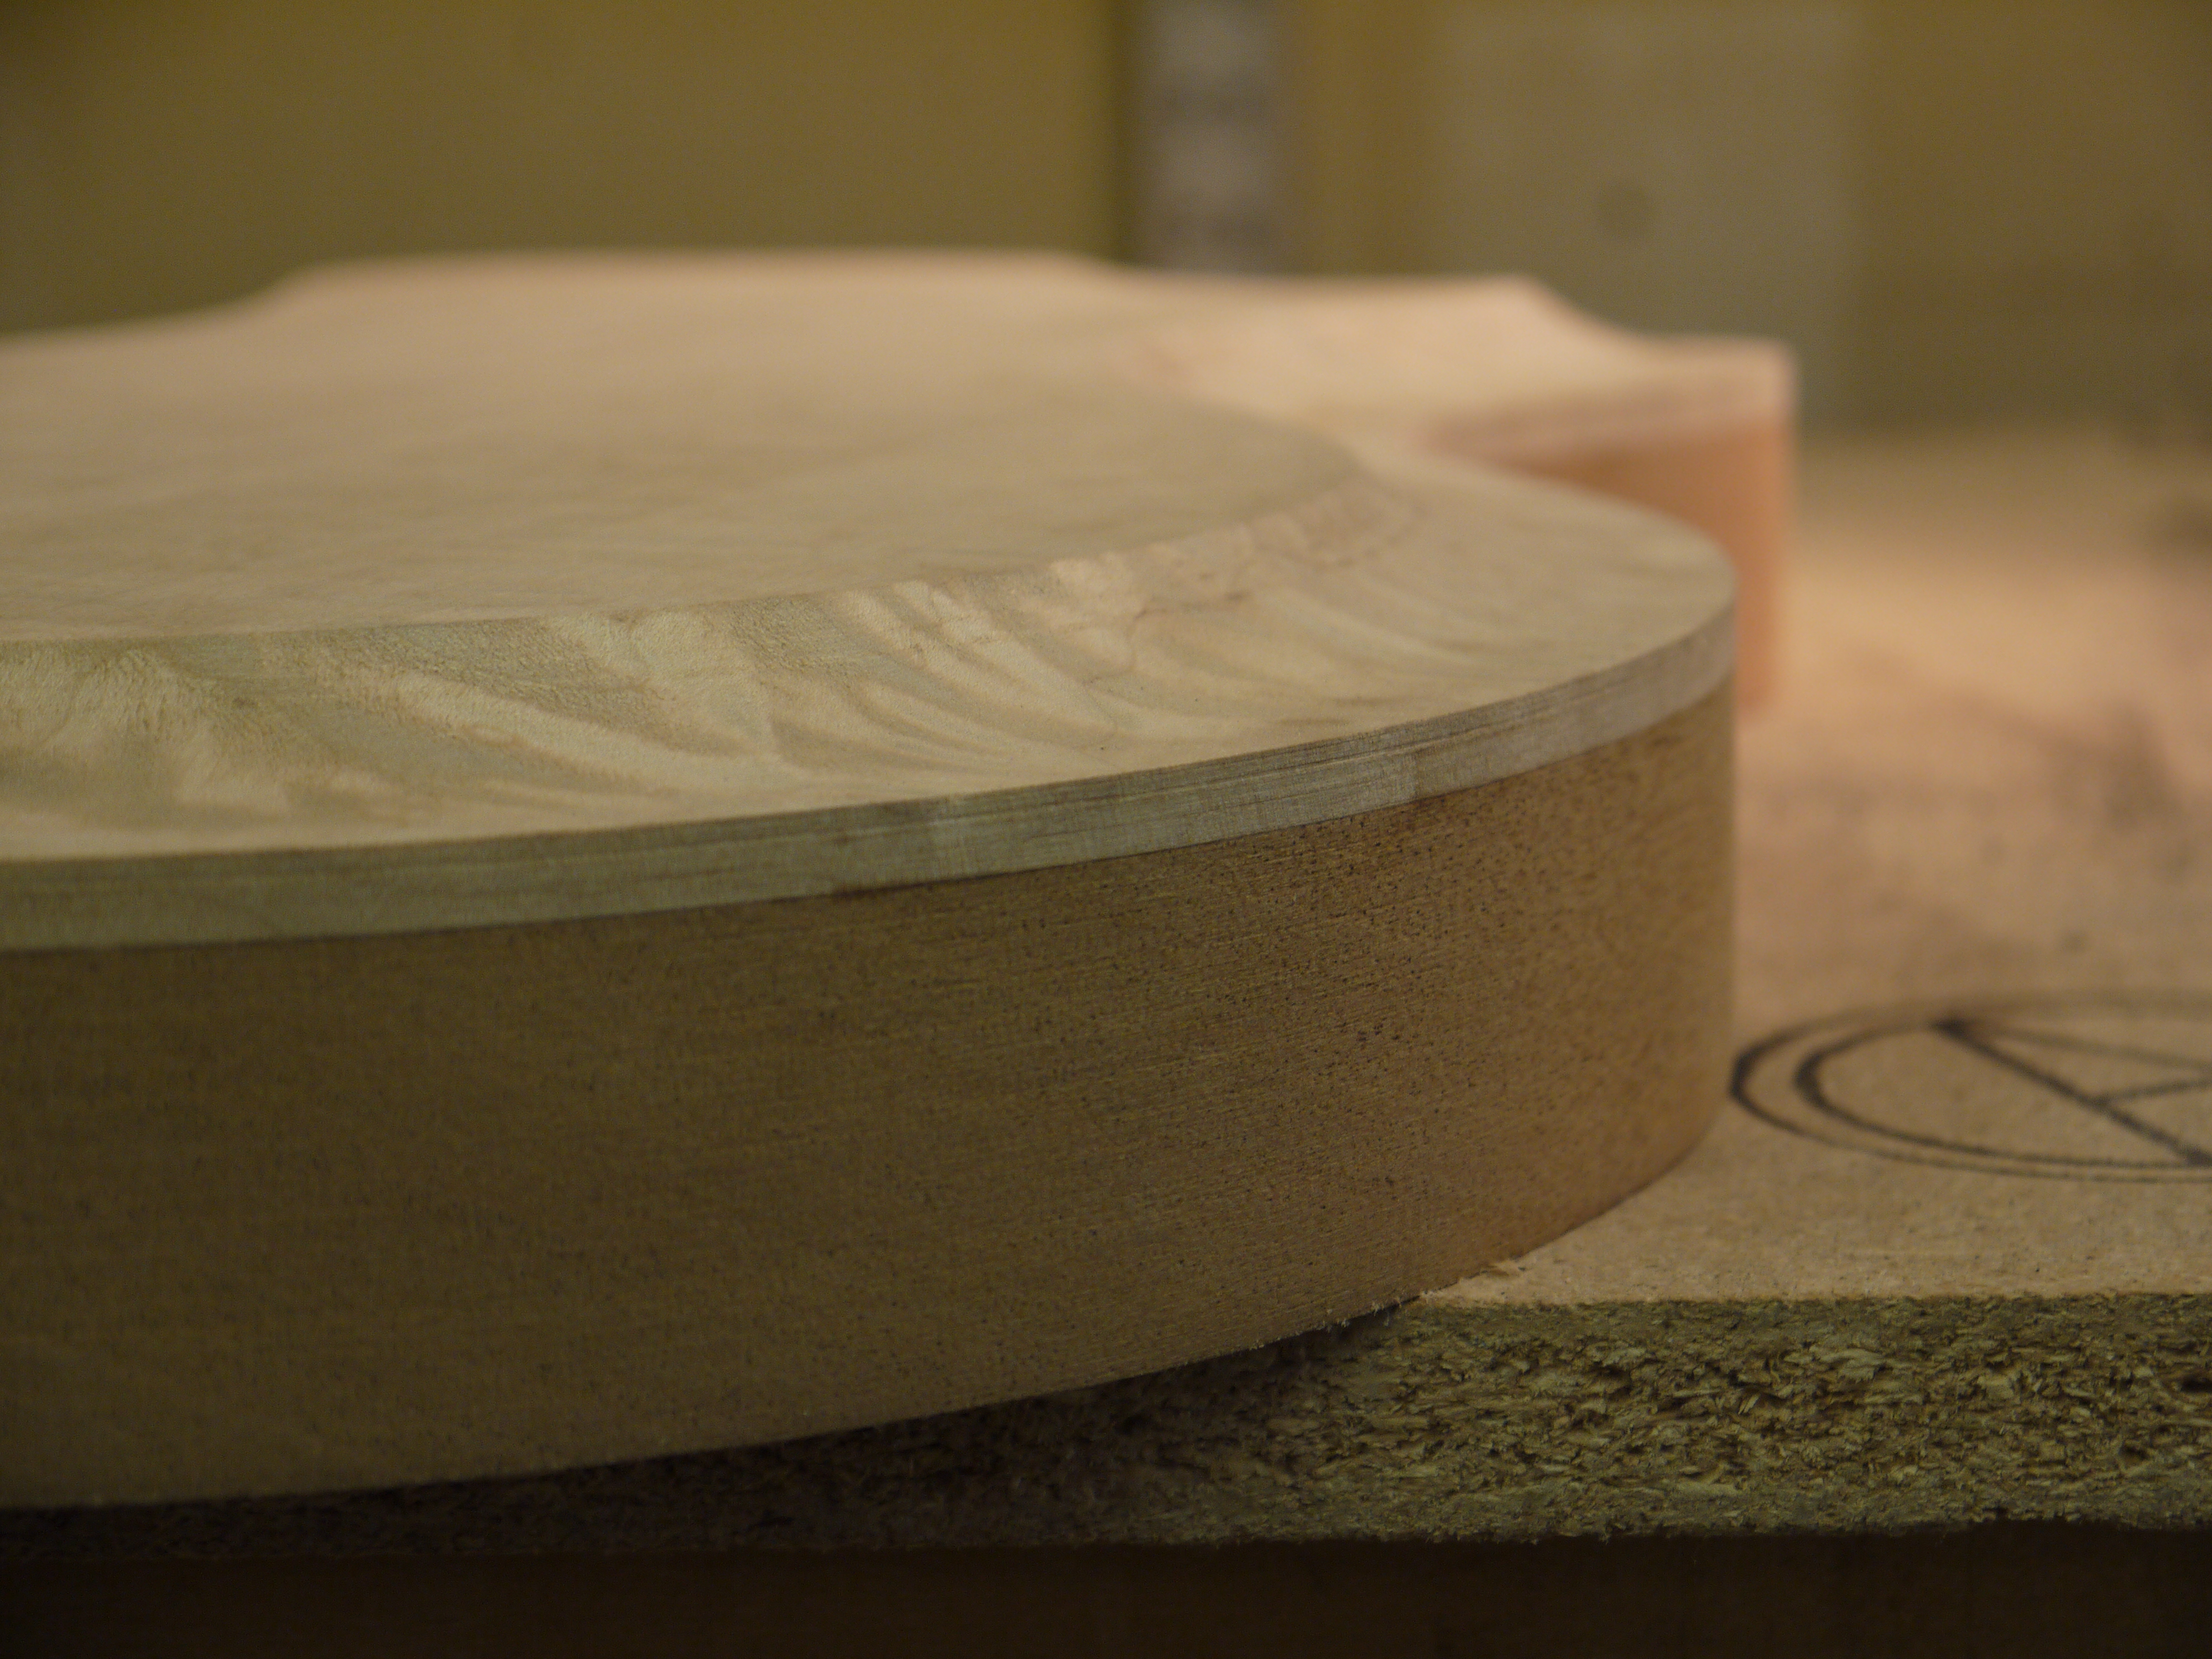
When you’re done, it will look like this…
As you can see, you have a nice even bit of natural binding and a very uniform slope up to the top surface…and the hardest part is done. Look for the rest of the “carving” process in Part 2. Cheers!


Hi,
Can You tell me what kind of router bit you used ?
#39456 Rockler horizontal panel cove bit.
Hey, do you use Rockler Cove Horizonta 2-1/2″ or 3-1/2″?
I’m using the 3 1/2″. #39456 horizontal panel cove. Cheers!
Thanks bro.
Bro, bottom wood do you use and your dimensions?
The guitar pictured was mahogany with maple cap and was generally patterned after a Les Paul, so very similar dimensions with some mods to make it my own. Unfortunately it’s been so long since I built this one that I don’t remember any specific dimensions.